Groups and permissions
In this section, we’ll cover how to set up permissions in your Slingr app. We’ll create a new field for tasks to identify the user assigned to each task. Additionally, we’ll create two groups: Manager and Support. The users in the Manager group will have access to all tasks, while the users in the Support group will only be able to see tasks assigned to them and won’t be able to reassign tasks or change the task title.
Create the field “Assignee” on tasks
To start, let’s create the new field for tasks:
Right-click on the node
Model > Entities > Tasks > Fields, and selectNew Fieldfrom the dropdown menu.Fill in the form with the following details:
Label: AssigneeName: assigneeType: RelationshipRelated entity: System > Users
Click on
Create and Edit.Set the
Default valuetoScript.Complete the field
Script.
return sys.context.getCurrentUserRecord();
Savethe changes.
Create “Managers” group
Now let’s add the two new groups:
Click the node
Security > Groups.Click on the
Createbutton on the top-right of the page.Fill in the form with:
Label: ManagerName: manager
Click on
Create and Edit.Now we need to add permissions to access entities and views. Click on the node
Security > Groups > Manager > Entity permissions.Select the
Taskentity and then click onApply permissions:
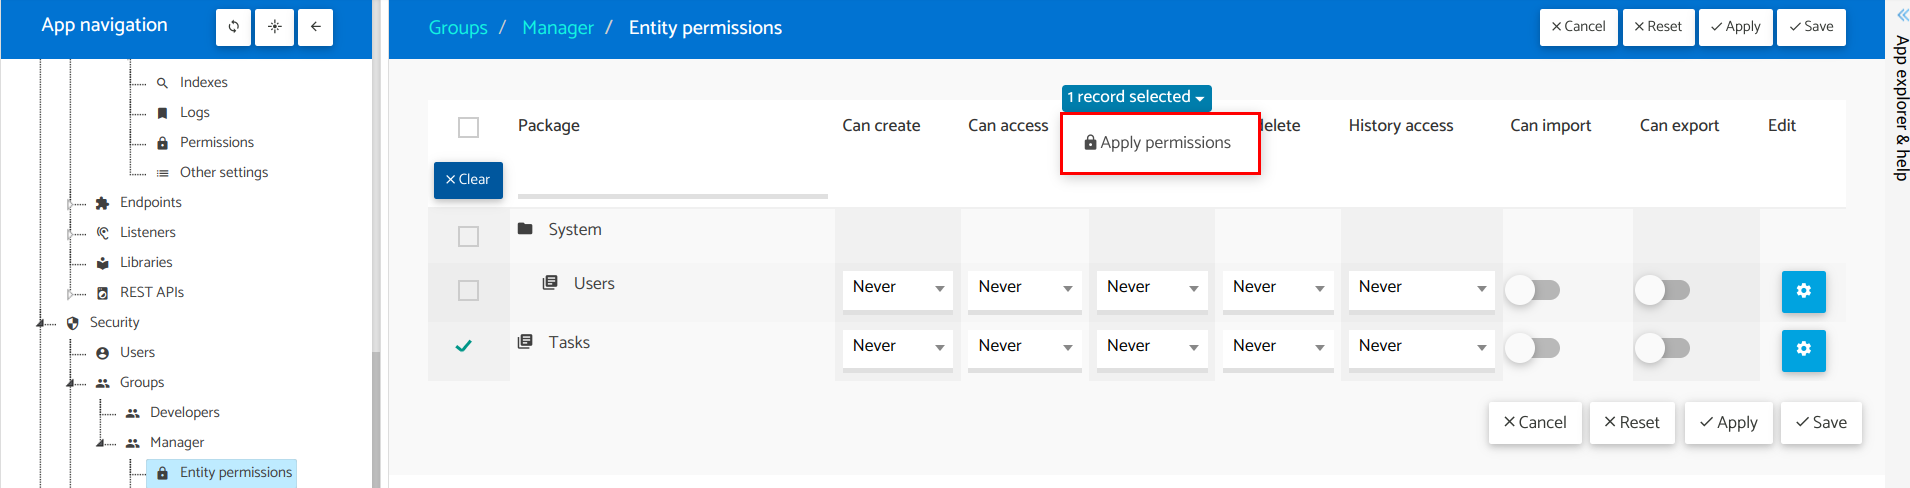
There select the option
Read/writeand click onApply.Then click on the configuration button under the
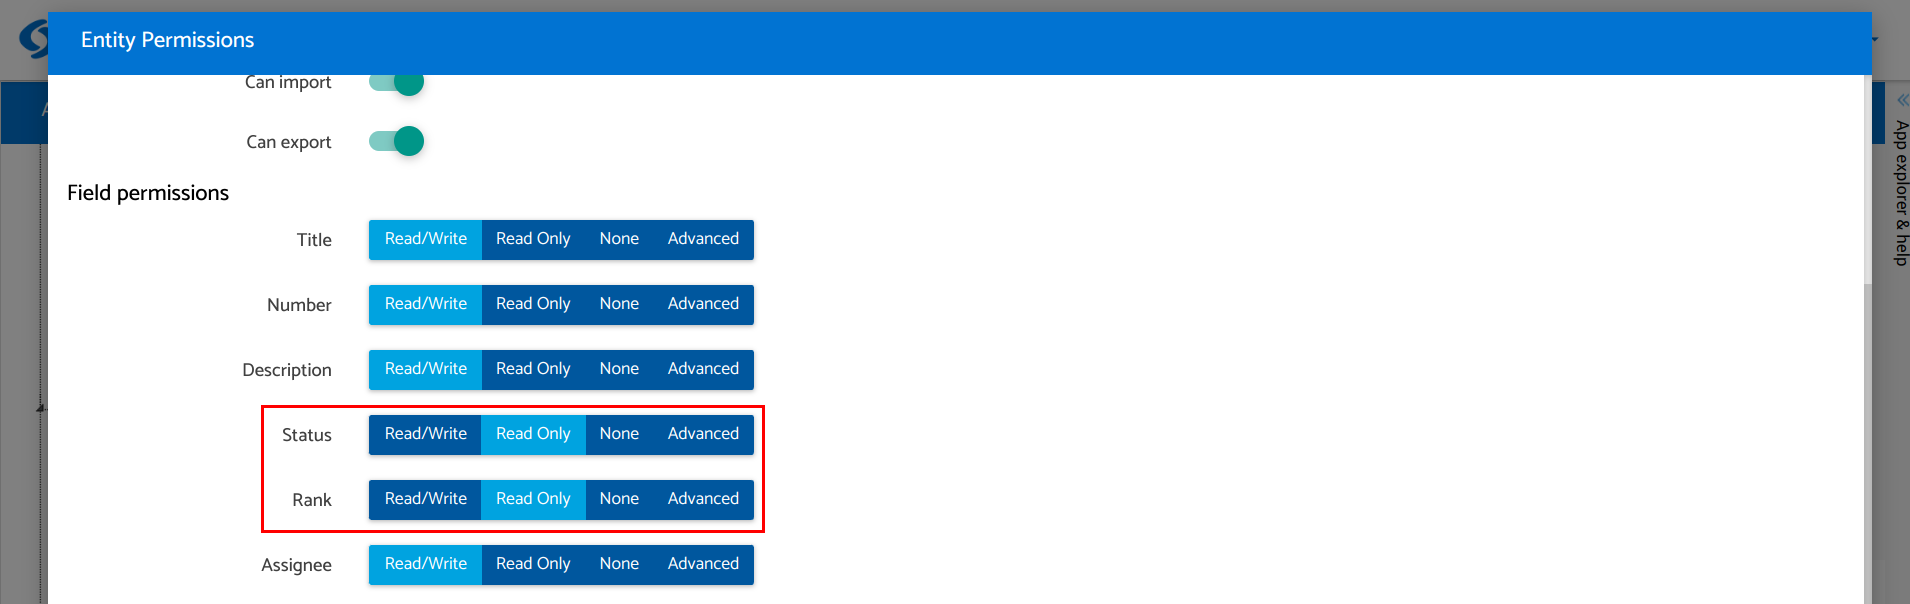
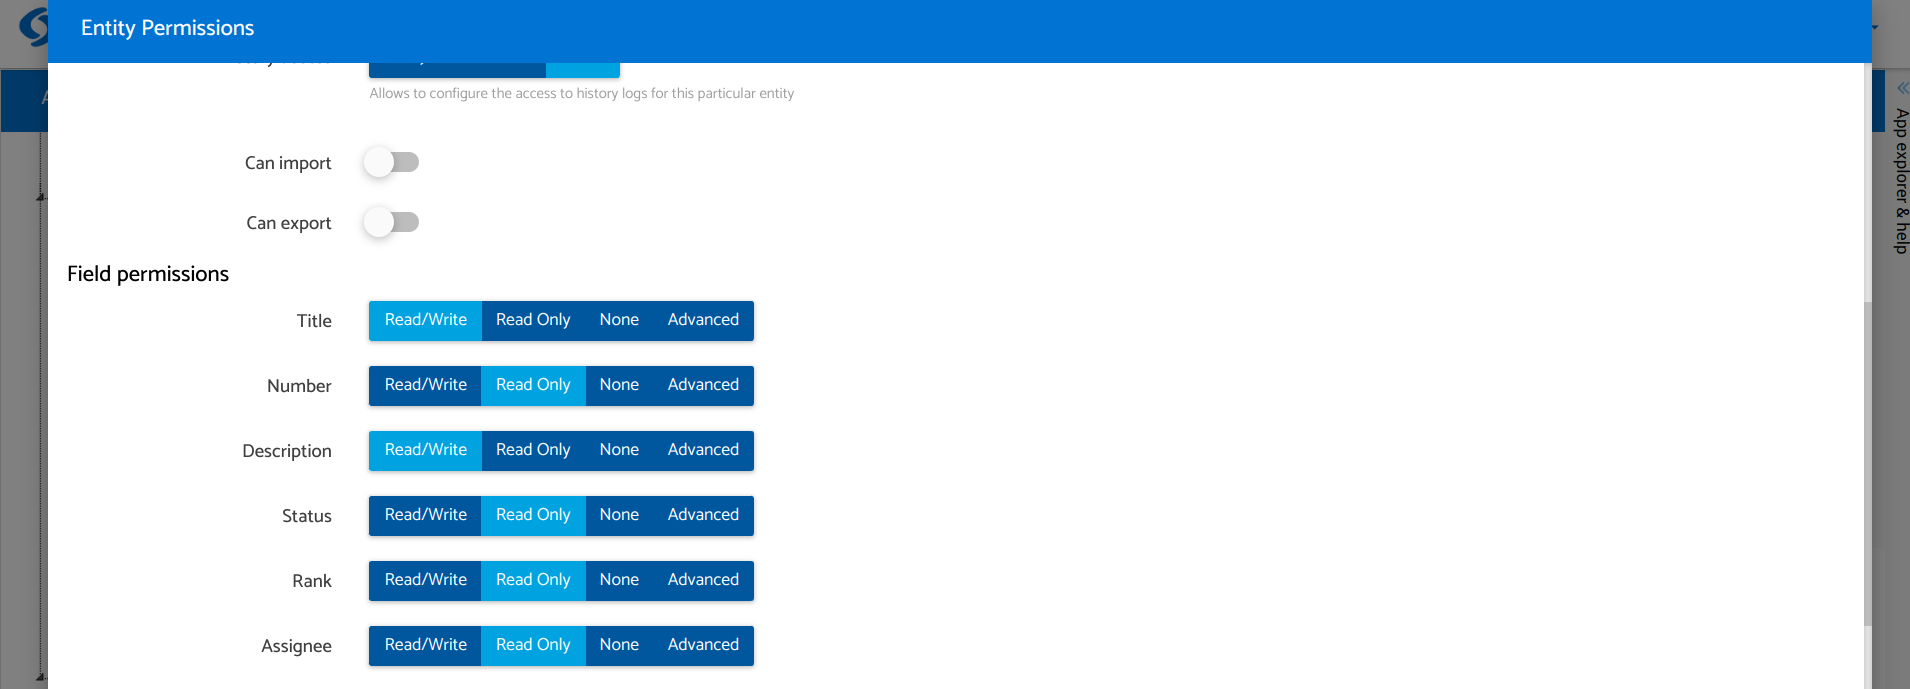
Editcolumn, and configure fields permissions so fieldsStatusandRankare read-only.
Now, select the
System > Usersentity and then click onApply permissions, and this time selectRead-Only.Finally, click the
Applybutton on the top-right of the listing to persist changes.Click on the node
Security > Groups > Manager > View permissions.Set the flag in the column
Permissionfor both views:
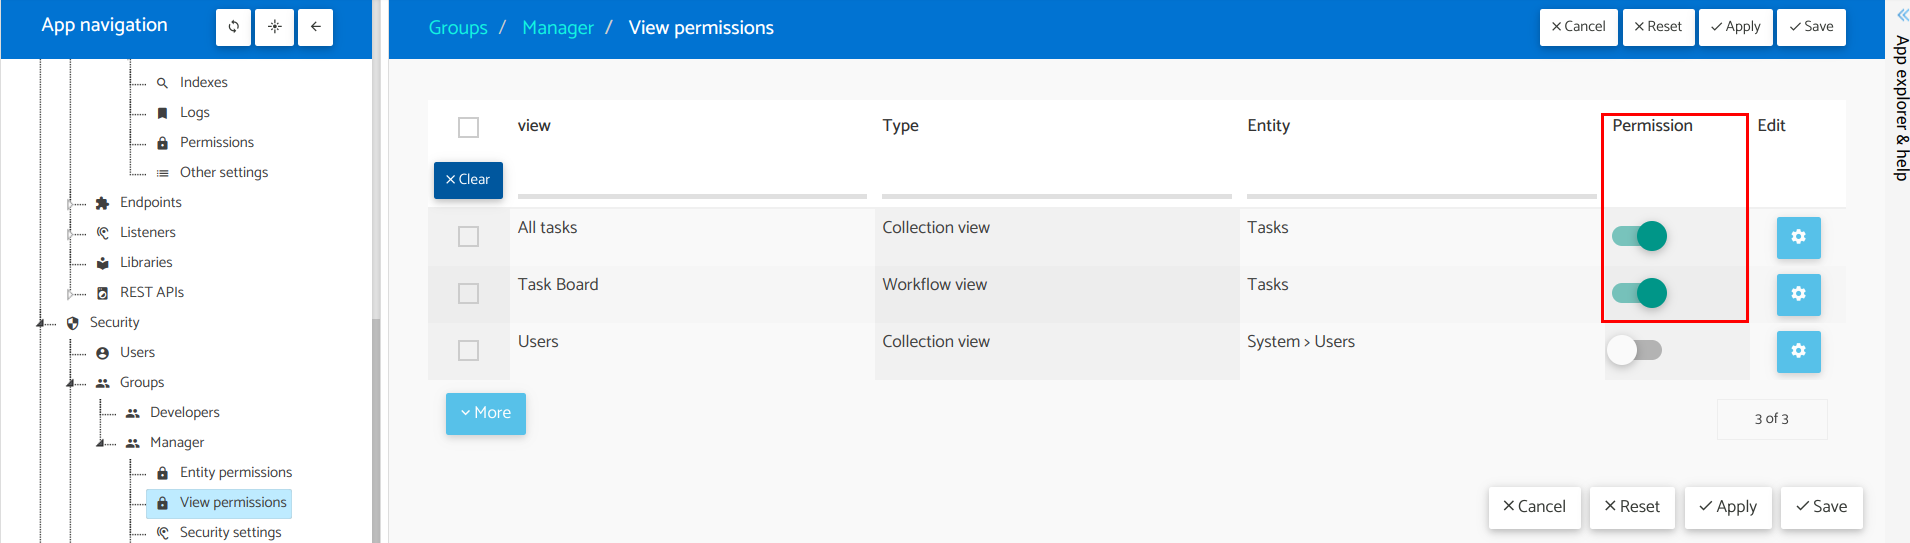
- Finally, click the
Applybutton on the top-right of the listing to persist changes.
Create a “Support” group
Now that we have our first group, create a new group called Support, and add some permissions to it:
Click on the node
Security > Groups > Support > Entity permissions.In the
Tasksentity, click on the configuration button under theEditcolumn.Configure entity permissions like this:
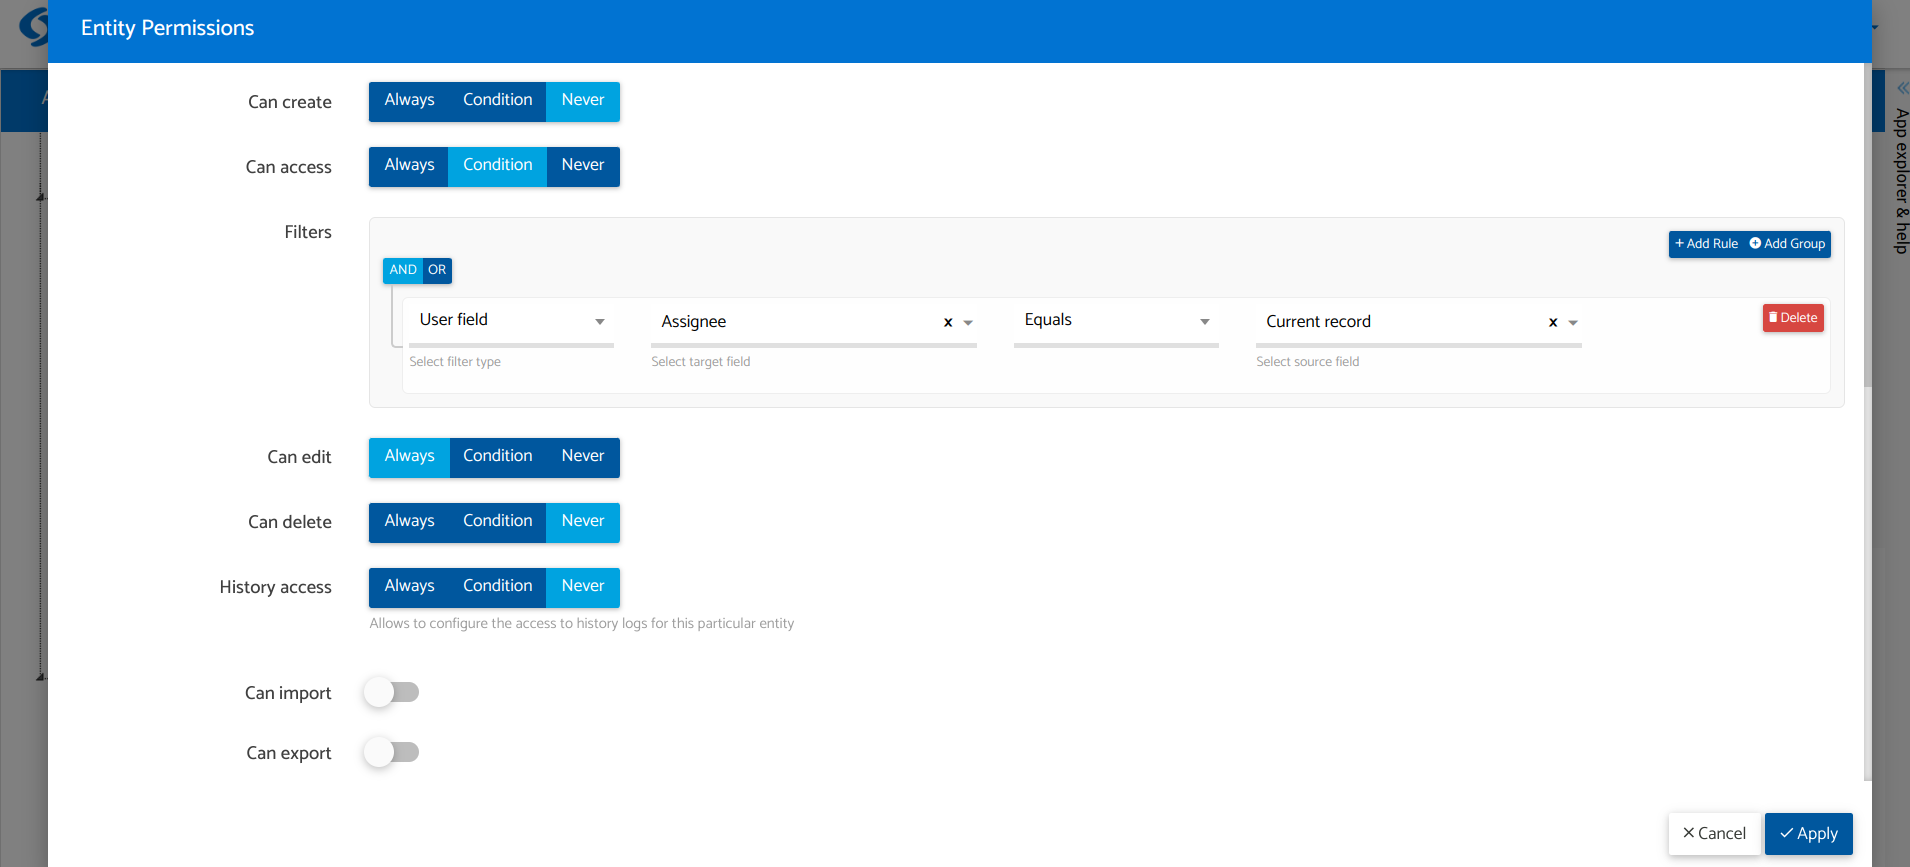
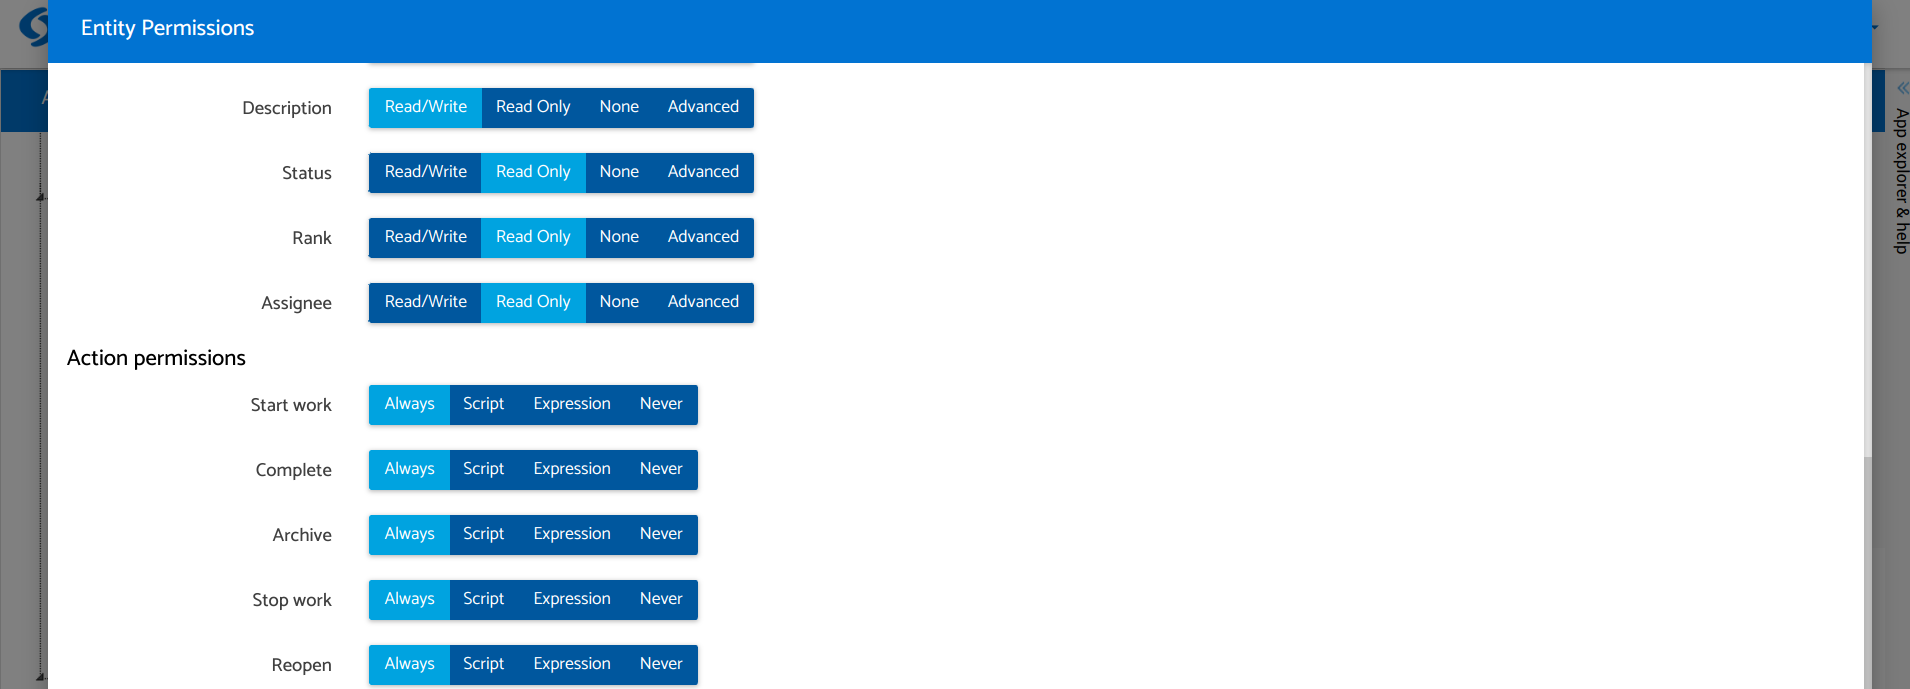
- Configure field permissions like this:
- Configure action permissions like this:
Click on
Apply.Now, select the
System > Usersentity, click onApply permissions, and selectRead-Only.Save changes by clicking on
Apply.Configure view permissions in
Security > Groups > Support > View permissionsin the same way as for managers.
Now that we have created the groups and defined their permissions, let’s push the changes so we can use these groups when creating users.
Create different users
It’s time to create a few users (make sure you have pushed the changes before):
Click on the node
Security > Users.Click on the
Createbutton at the top right of the page.Fill in the form with:
First name: Manager1Last name: TestEmail: manager1@test.comGenerate Password: trueGroups: Add the Manager group as Primary
- Click on
Createto save the user.
Then repeat the same process for these users:
| First name | Last name | Primary group | |
|---|---|---|---|
| Support1 | Test | support1@test.com | Support |
| Support2 | Test | support2@test.com | Support |
😊
Awesome! We have finished this section and are almost done with our app.
In the next section, we will learn how to work with different users in the runtime.