First steps - Builder
Hi, welcome to the builder! Here, we are going to build the app. As you can see on the left, there is a tree with multiple items, we will call them: nodes. Let’s start building something great.
Creating the “Tasks” Entity
The tasks entity serves as the central component in the task manager application. It allows users to create, store, and manage task records efficiently. Through this entity, users can access various views of their tasks, granting them the flexibility to organize and handle records according to their preferences and needs.
Now we will create the tasks entity and then some actions and views to display the records.
Let’s go!
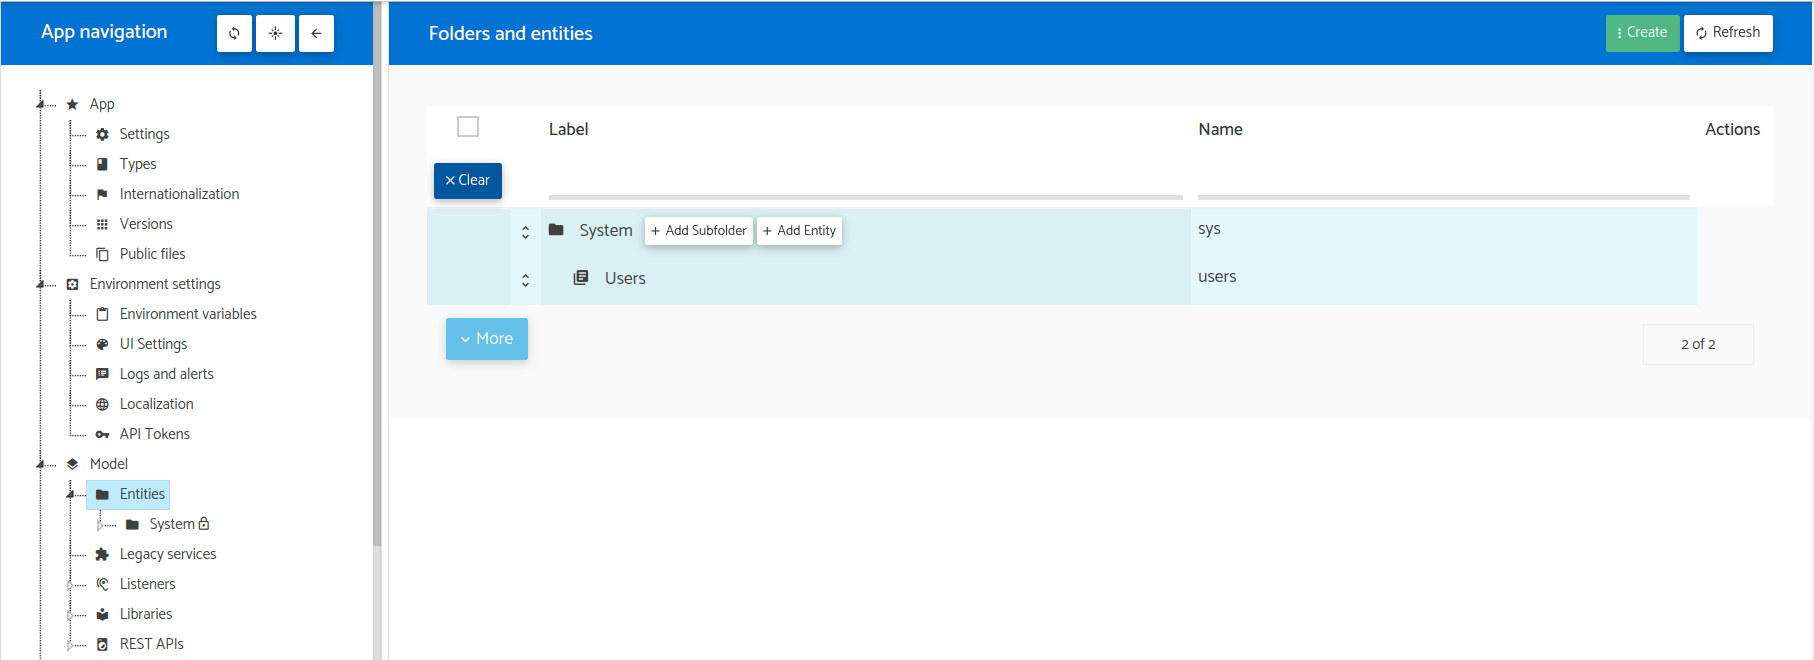
👉 Right-click on the node Model > Entities, and a dropdown menu will be shown.
👉 Click on New Entity.
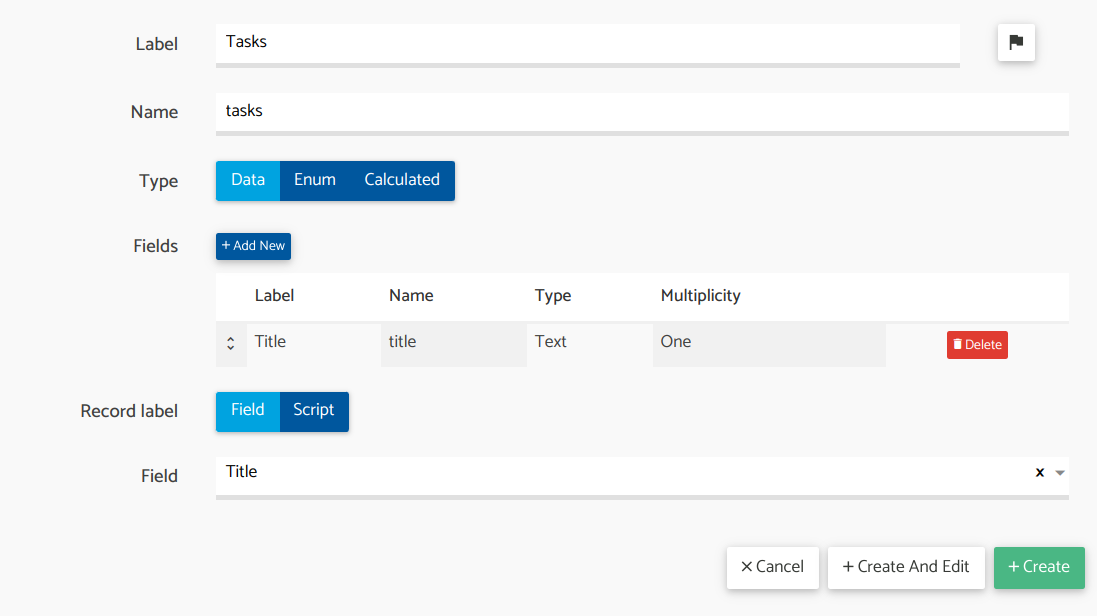
👉 Fill in the form with the following details:
Label: TasksName: tasksType: Data
👉 Let’s add a simple field. Fill the label with Title, the name with title, the type should be text, and the multiplicity should be one. Click on Add.
👉 Finally, let’s set the record label. The record label is calculated for every record, and it is something that will identify your record. It doesn’t need to be unique but should be human-friendly. Leave the option as Field, and in the dropdown, select Title.
👉 The form should look something like this. If so, click on Create.
Create some adittional fields
Great! Now that we have finished creating the entity, let’s add some more fields:
👉 Right-click on the node Model > Entities > Tasks > Fields, and click New Field.
For every field, you will need to complete the form with some basic information: label, name, type, and multiplicity. Create the following fields with these settings:
| Label | Name | Type | Required | Default value | Notes |
|---|---|---|---|---|---|
| Number | number | Auto increment | - | - | This a number that will be incremented for every new task created. |
| Title | title | Text | Yes | - | The title of the task. |
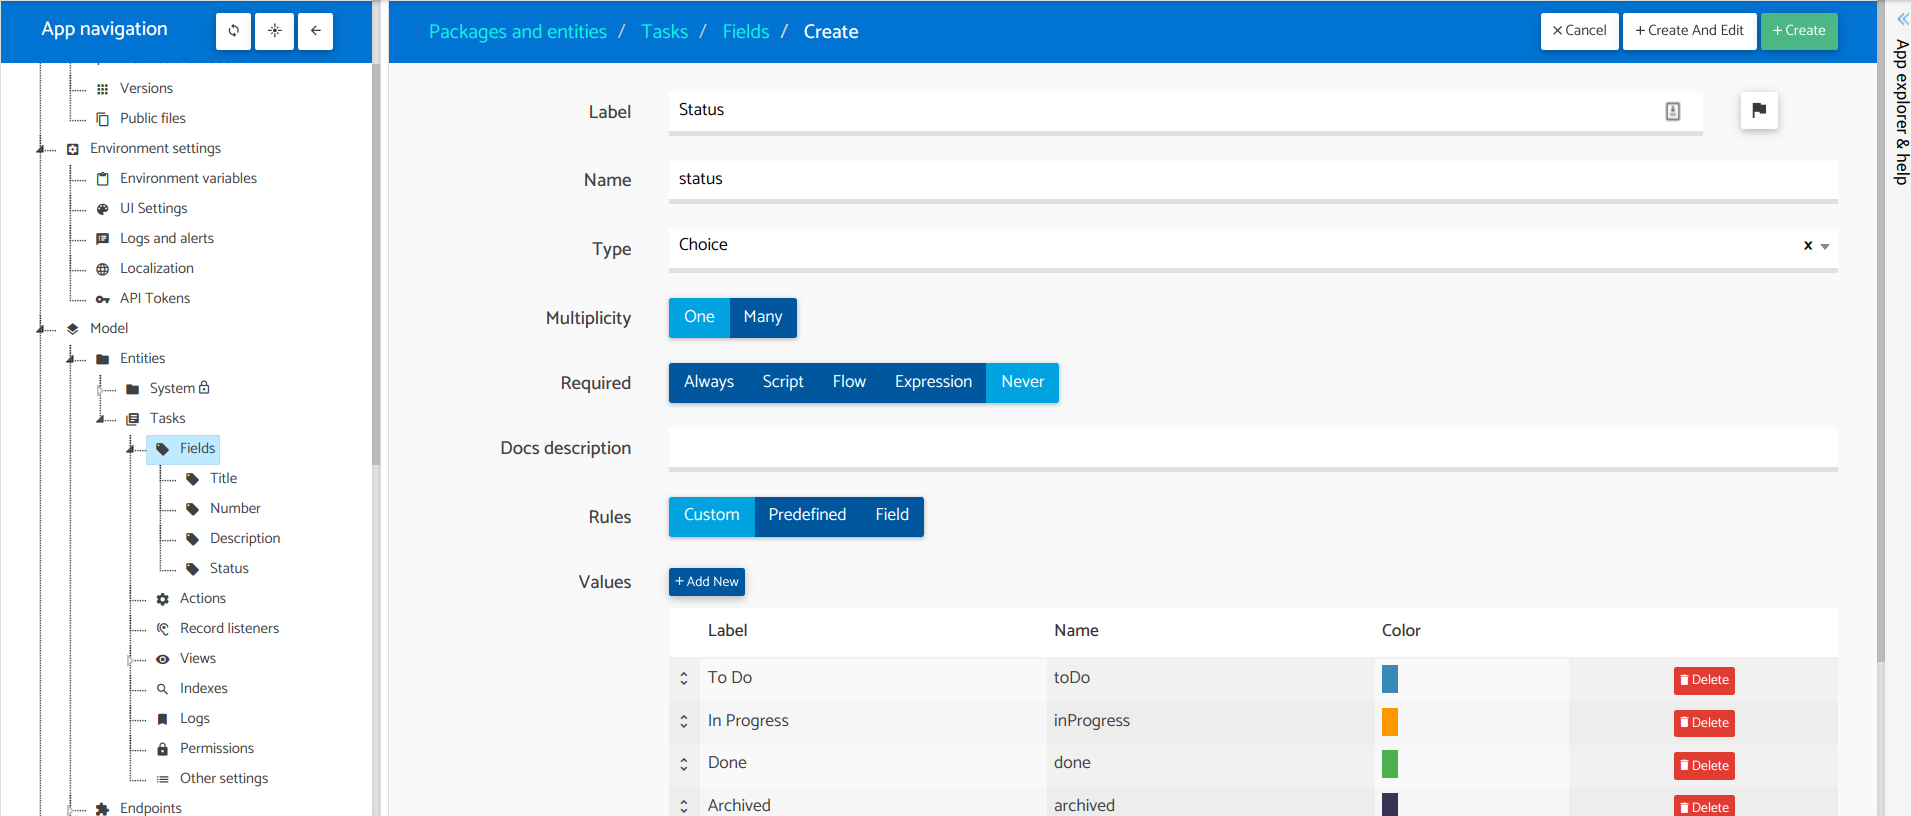
| Status | status | Choice | Yes | To Do | This is the status of the task. Possible values will be To do, In progress, Done and Archived |
| Description | description | HTML | No | - | A longer description of the task. |
Depending on the type, you might see some additional options at creation time, which is the case for the Status field where you will need to add the four possible statuses: To do, In progress, Done, and Archived. It should look something like this:
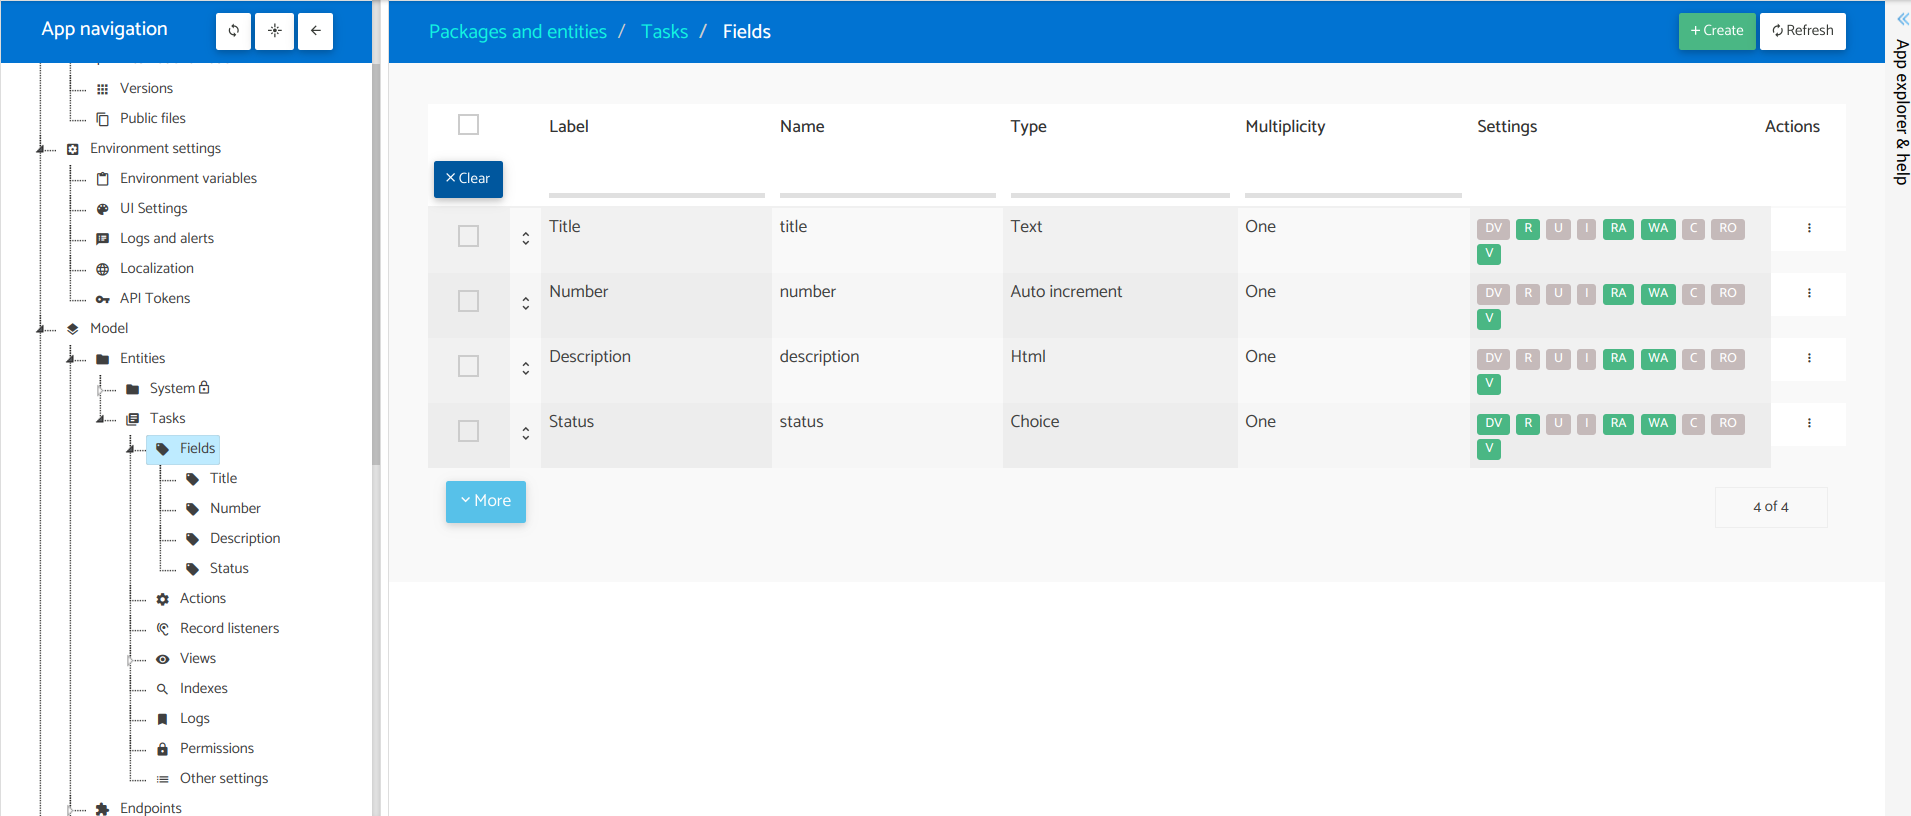
Clicking on Save and edit will create the field and will open the details view for that field, where you will be able to change other settings, like the default value and required flag. You can also open it by clicking the field node in the tree. In our sample app, we need to take care of the following things for these fields:
👉 Title: the setting Required should be set to Always.
👉 Status: the setting Required should be set to Always. Also, in the Default value, you should choose Value and then select the value To Do from the dropdown.
Remember to save all the changes. In the end, your structure should look similar to this one:
Create a simple grid view
Now that we have created the fields for the entity, the next step is to create a view so we can see something in our app. For that, we will create a simple grid view that will allow you to list, create, edit, and delete tasks. To create the grid view, follow these steps:
👉 Right-click on the node Model > Entities > Tasks > Views, and a dropdown menu will be shown.
👉 Click on New View > Grid View.
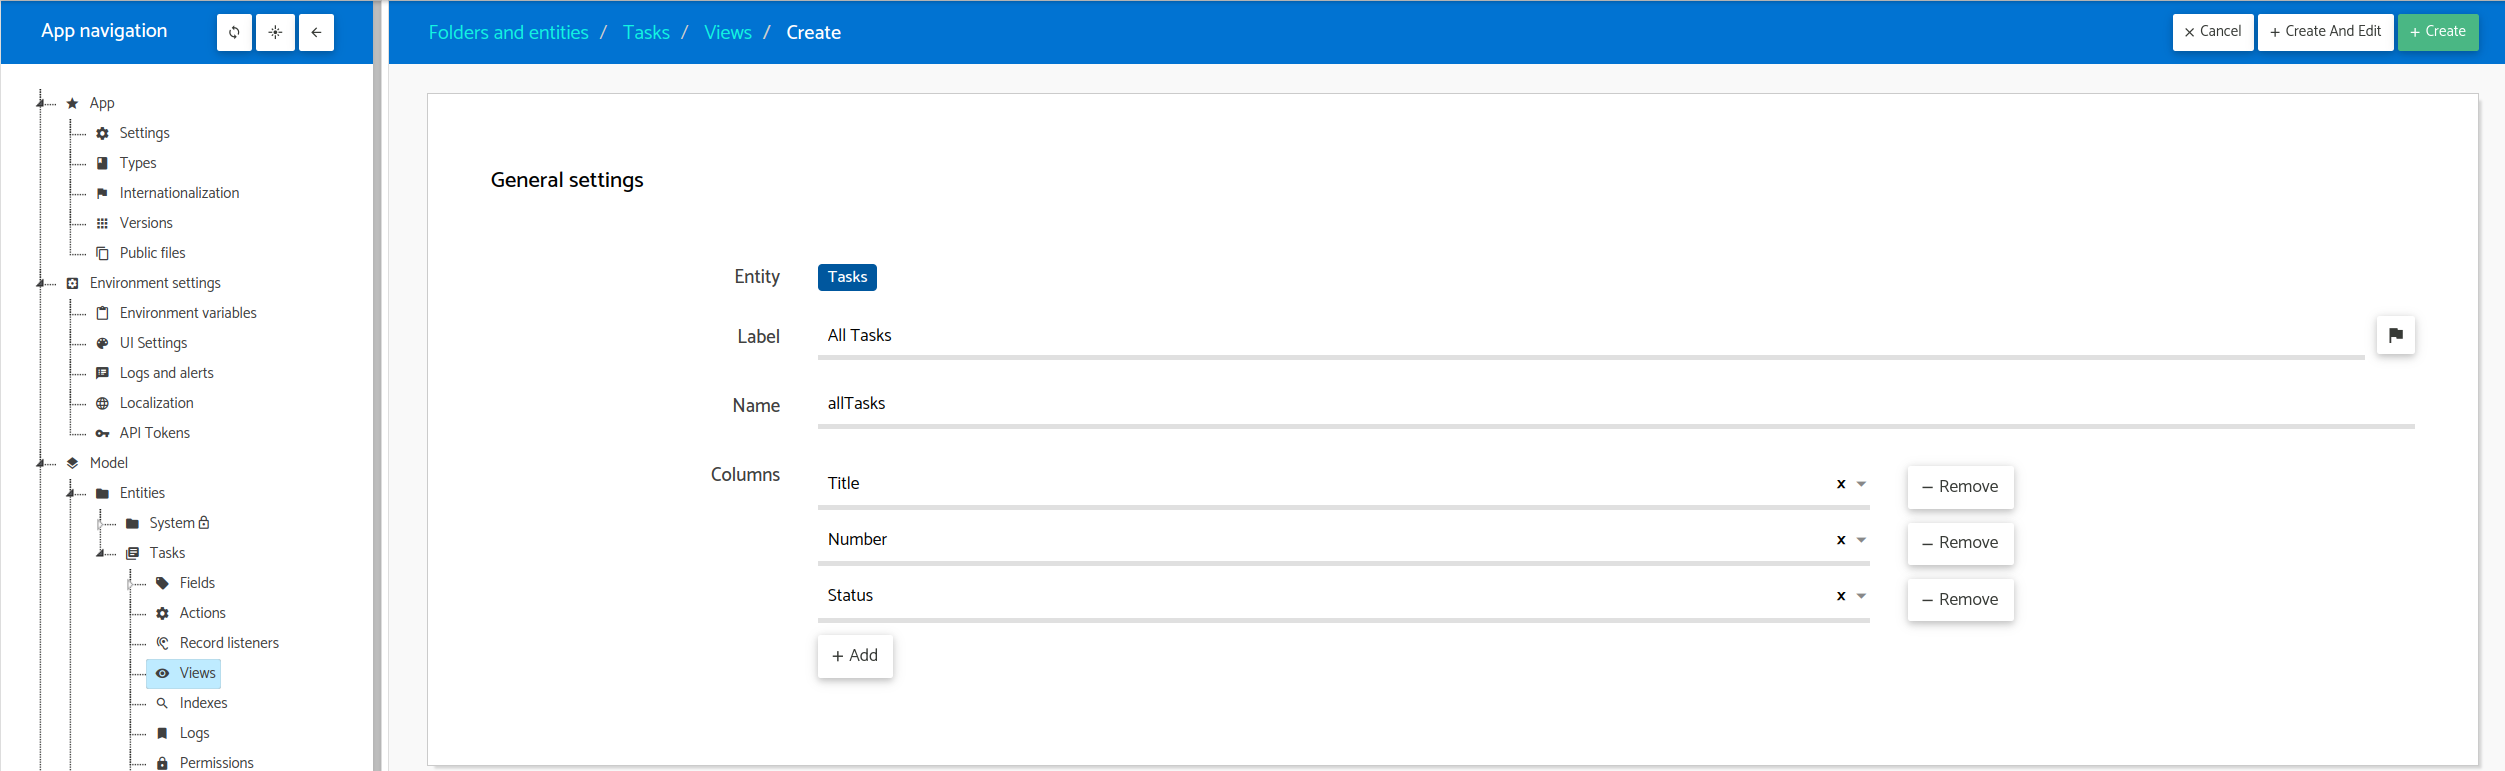
👉 Fill in the form with the following details:
Label: All tasksName: allTasksColumns: Number, Title, Status.
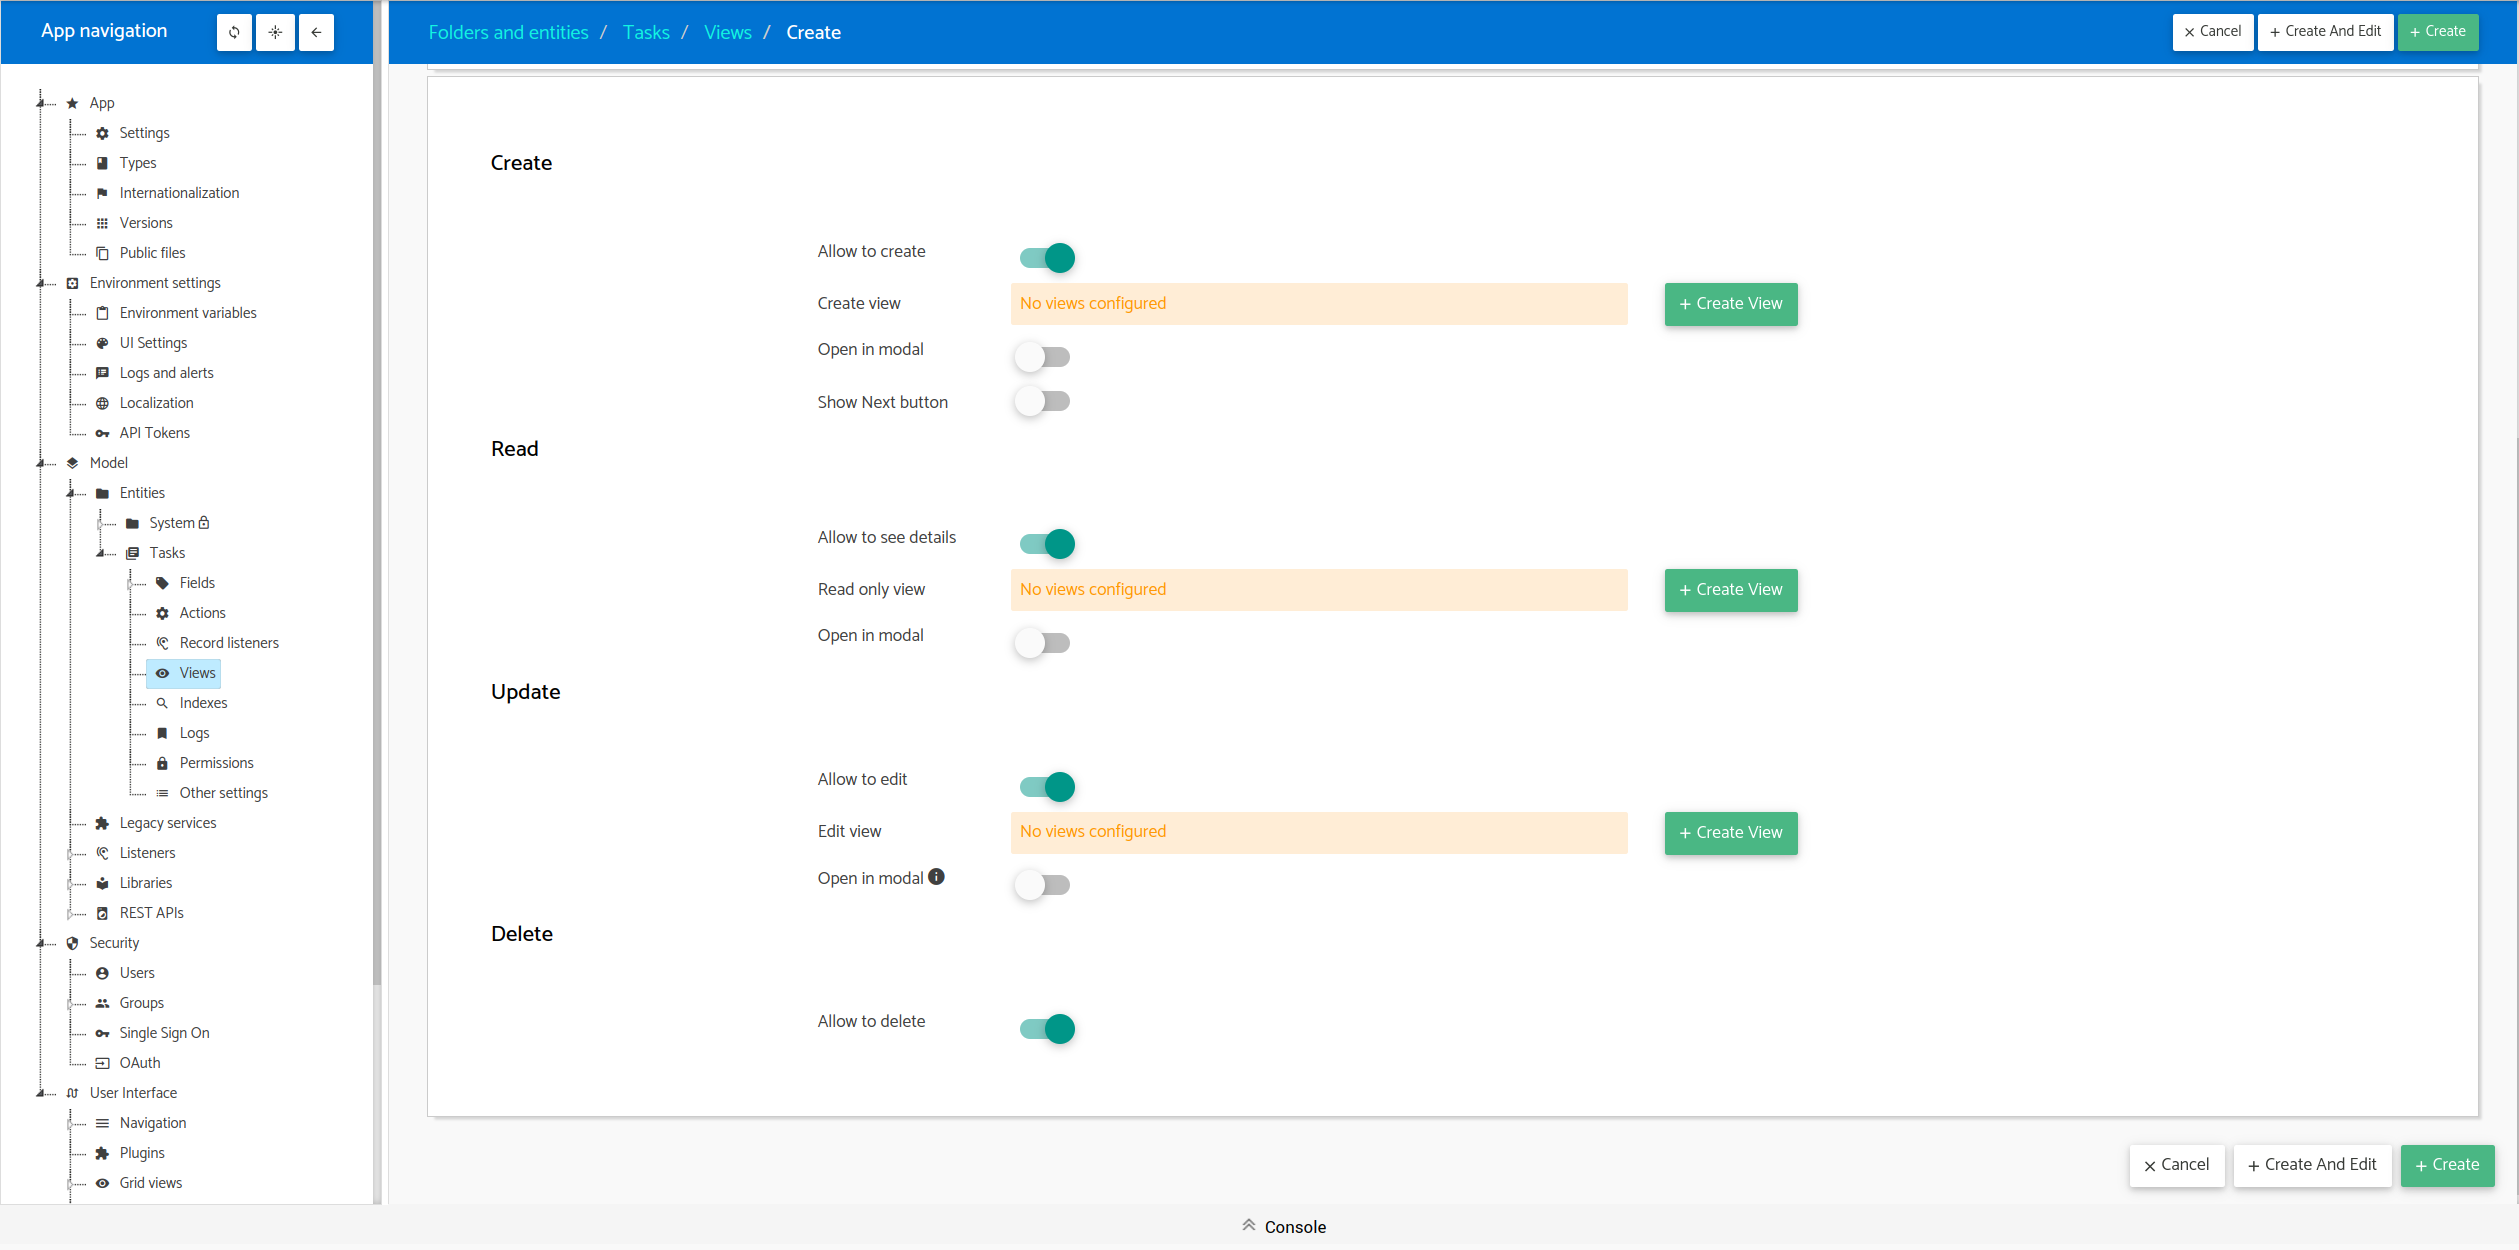
It’s time to configure the CRUD views (Create, Read, Update, Delete) within our grid view. This action will generate and configure generic views for creating, updating, and accessing records in read-only mode.
👉 Click on Create View for each Create, Read and Update sections.
Finally, 👉 Click on Create.
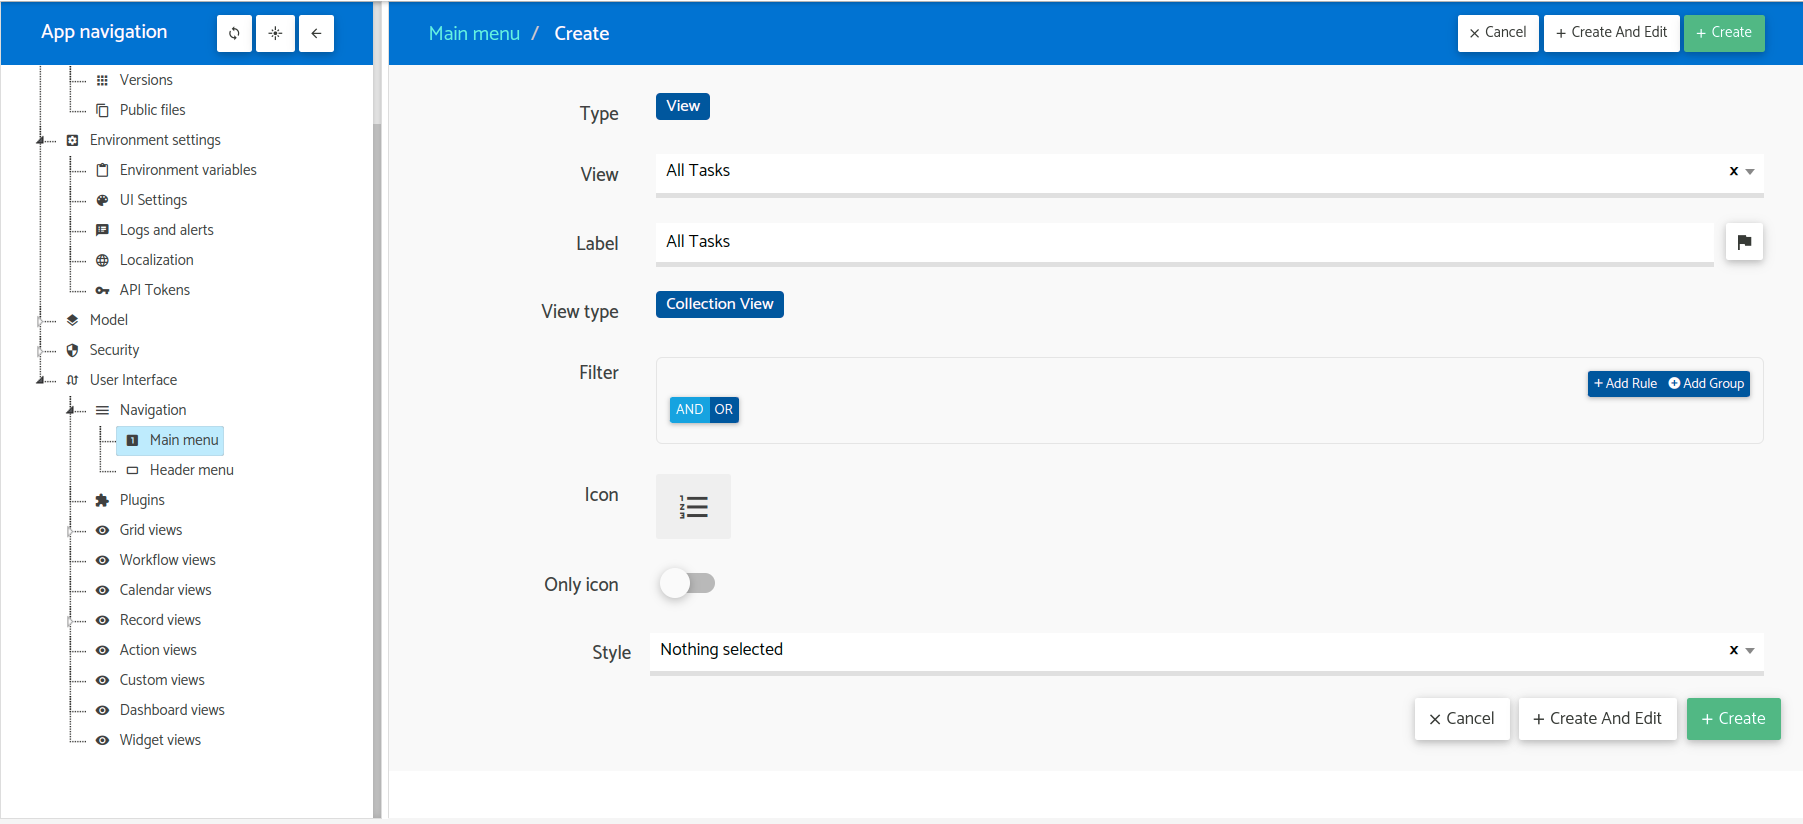
Once we have the view, we need to indicate how to navigate to it. Let’s add it to what’s going to be the sidebar of our app. Click the node User interface > Navigation > Main menu, and follow these steps:
👉 Click on Add new menu entry on the top-right of the page, and then click on the option Add view.
👉 In the view, select the view All Tasks, and complete the label with All Tasks. You can add an icon if you want or select a color style.
👉 Click on Create.
Push your changes
Great! We have a basic app already configured.
Let’s see how it looks at runtime, but first, we need to push the changes so the runtime has the latest version of our app.
👉 On the header of the builder, click the button next to your name (The hamburger button).
👉 A dropdown menu will be shown. Click on "Push Changes."
👉 A popup will appear, displaying the changes you have made. Review them, and if everything looks good, click on "Push Changes."
Once the process is done, the changes will be reflected in the runtime. To open the runtime, go back to the developer portal, in the Apps page, click the runtime button (The first one). That will automatically open the runtime in a new tab.
🎉
Fantastic!
Let’s wrap this section here; we have made great progress. If you want to learn more, let’s go to the next section: First Look at Our App.