Sign Up and Single Sign On
Identity providers enable users to access your app without requiring them to create new accounts. Instead, users can utilize their existing accounts from supported identity providers to sign in.
For instance, enabling Slack as an identity provider permits users with Slack accounts to access your app. However, specific settings can be configured to limit access.
Listed below are the currently supported identity providers.
Shared options for all identity providers
These options are accessible to all identity providers.
Label
This label will be displayed on the login page button. A label like Login with Slack! provides clarity that users can sign in using Slack credentials.
Name
This internal identity provider name must not contain special characters or spaces. If used in scripts or the REST API, a manual update may be required if the name is altered.
Icon
This icon is showcased on the login button within the login screen. A square icon with a recommended minimum size of 64x64 pixels is advised.
Allow user creation
When enabled, users without accounts attempting to sign in through the identity provider will trigger new user creation within the app. When disabled, users must already have accounts in the app.
Allow user data update
If this option is active, user information will be updated with data from the identity provider upon sign-in. When inactive, user creation will occur, but no modifications will be made to user information in the app.
Allow provider addition
Enabling this option automatically adds an identity provider when a user attempts to sign in with it. If disabled, manual allowance is necessary.
Slingr
The Slingr identity provider enables users with a custom form to register in your application.
In the tree of the builder, on the SSO option, you can see the Slingr identity provider.
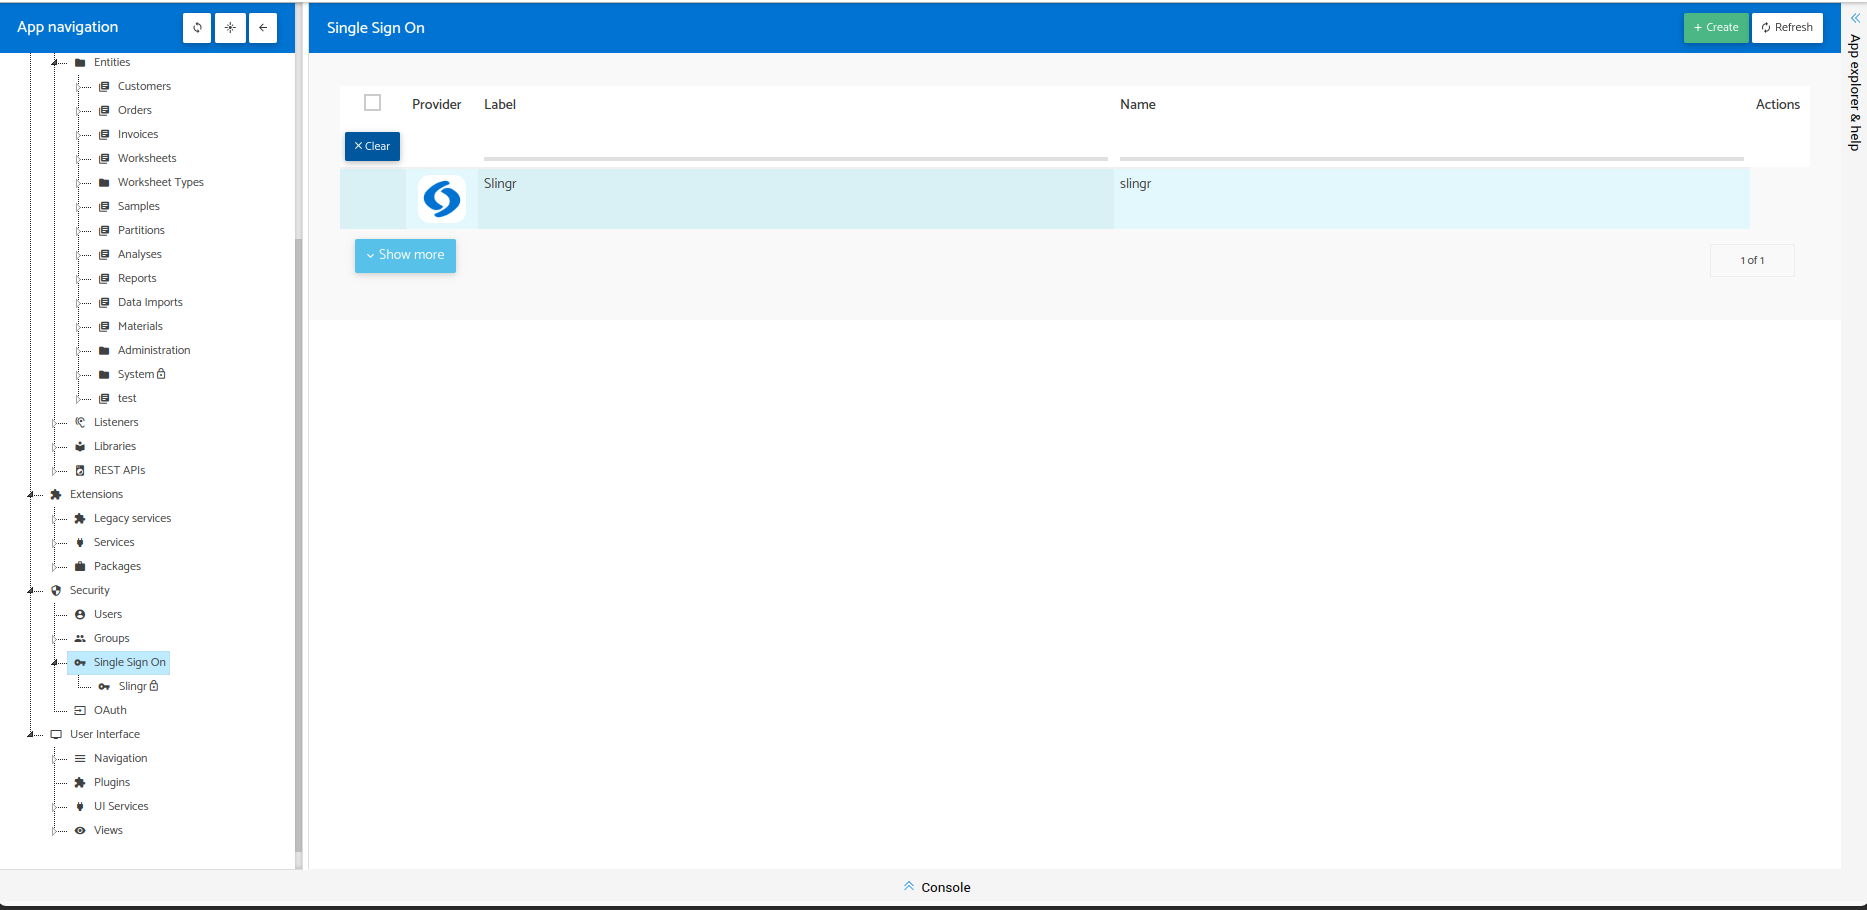
Inside, you have some fields like label, name, icon, and type. In the last place, you can see the flag to enable the Sign-Up. This flag allows you to configure a Create View, then will be shown in the Sign-Up view in the runtime and the group that the new user will have.
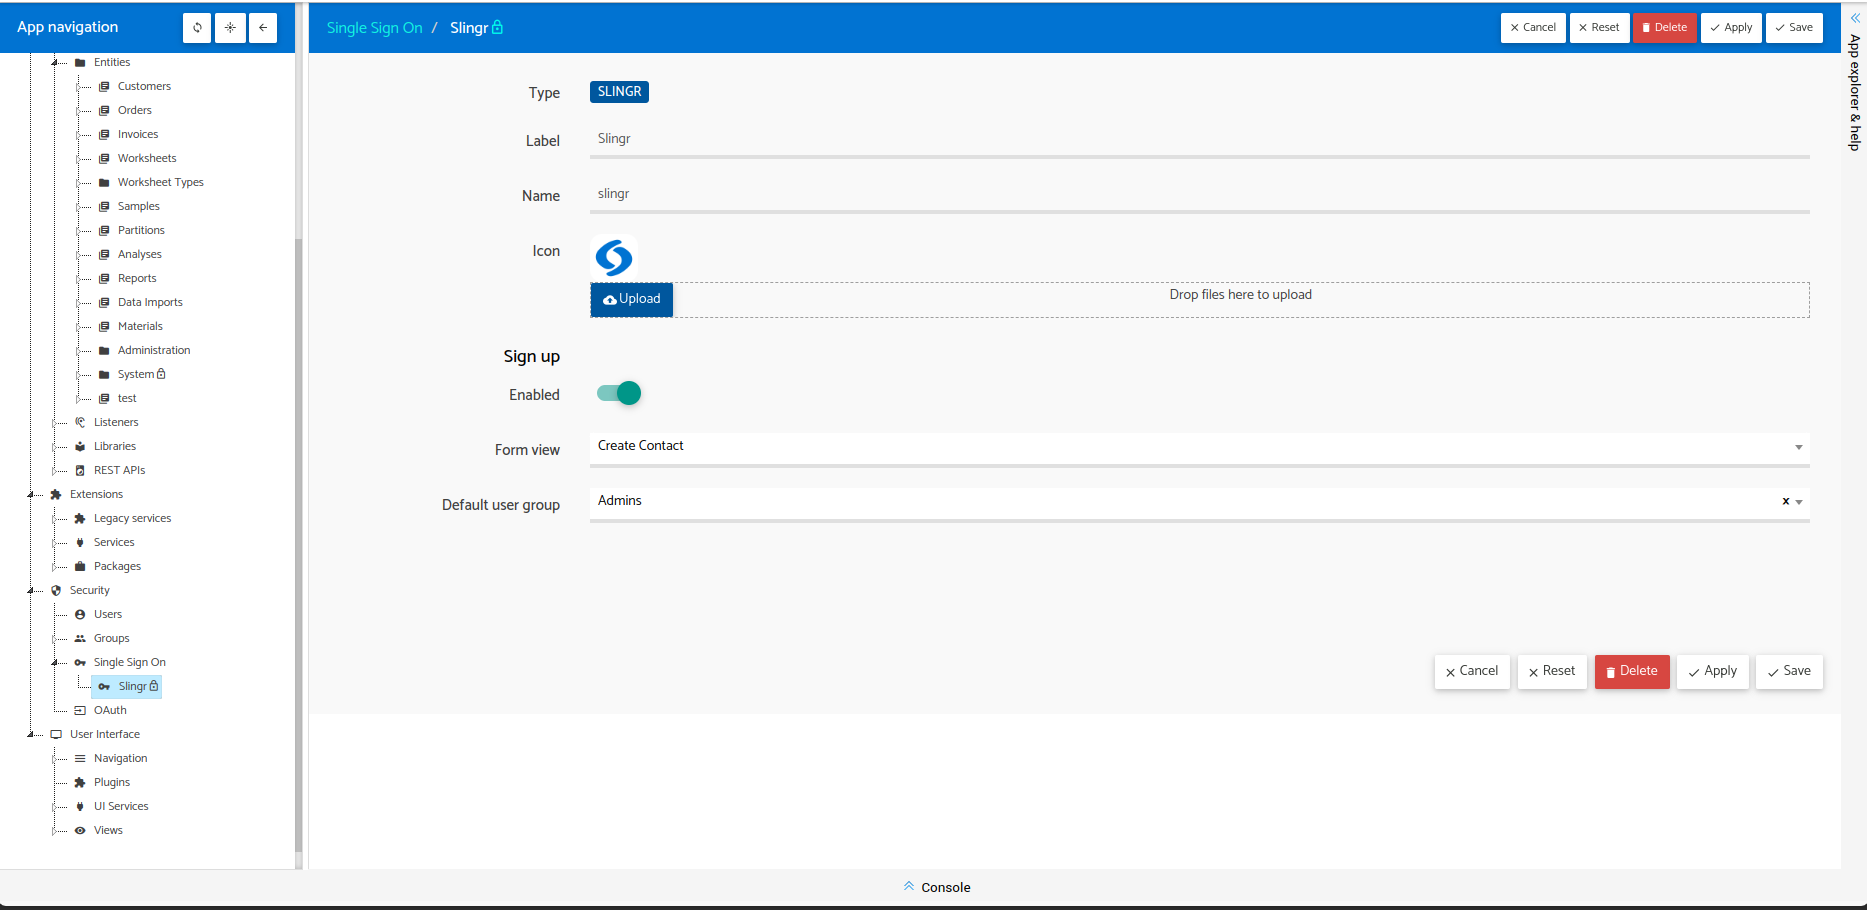
Form view
This is the reference to a Record View of type Create that is under the entity Users (sys.users).
Default user group
Any new user created will be automatically assigned to this group as the Primary group.
Step by step in Custom Sign Up
- Create under the entity Users a Record View and assign it the type Create.
- In the view fields, delete the field Send Welcome Email.
- Go to Identity Provider Slingr and configure the created view.
- For example, if you want an email to be sent to activate the user and enter a password after activated,
- Delete only the field Authorization -> Generate Password.
- In the before show event, you configure:
record.field('sendWelcomeEmail').val(true); record.field('authentication.generatePassword').val(true);- If you do not want an email to be sent and in the registration, and the user enters his password.
- Delete only the field Authorization -> Generate Password.
- In the before show event, you configure:
record.field('sendWelcomeEmail').val(false); record.field('authentication.generatePassword').val(false);- If you want the user to register but not activate his account and activate it manually after resetting his password.
- Delete only the field Authorization -> Generate Password.
- In the before show event, you configure:
record.field('sendWelcomeEmail').val(false); record.field('authentication.generatePassword').val(true); - For example, if you want an email to be sent to activate the user and enter a password after activated,
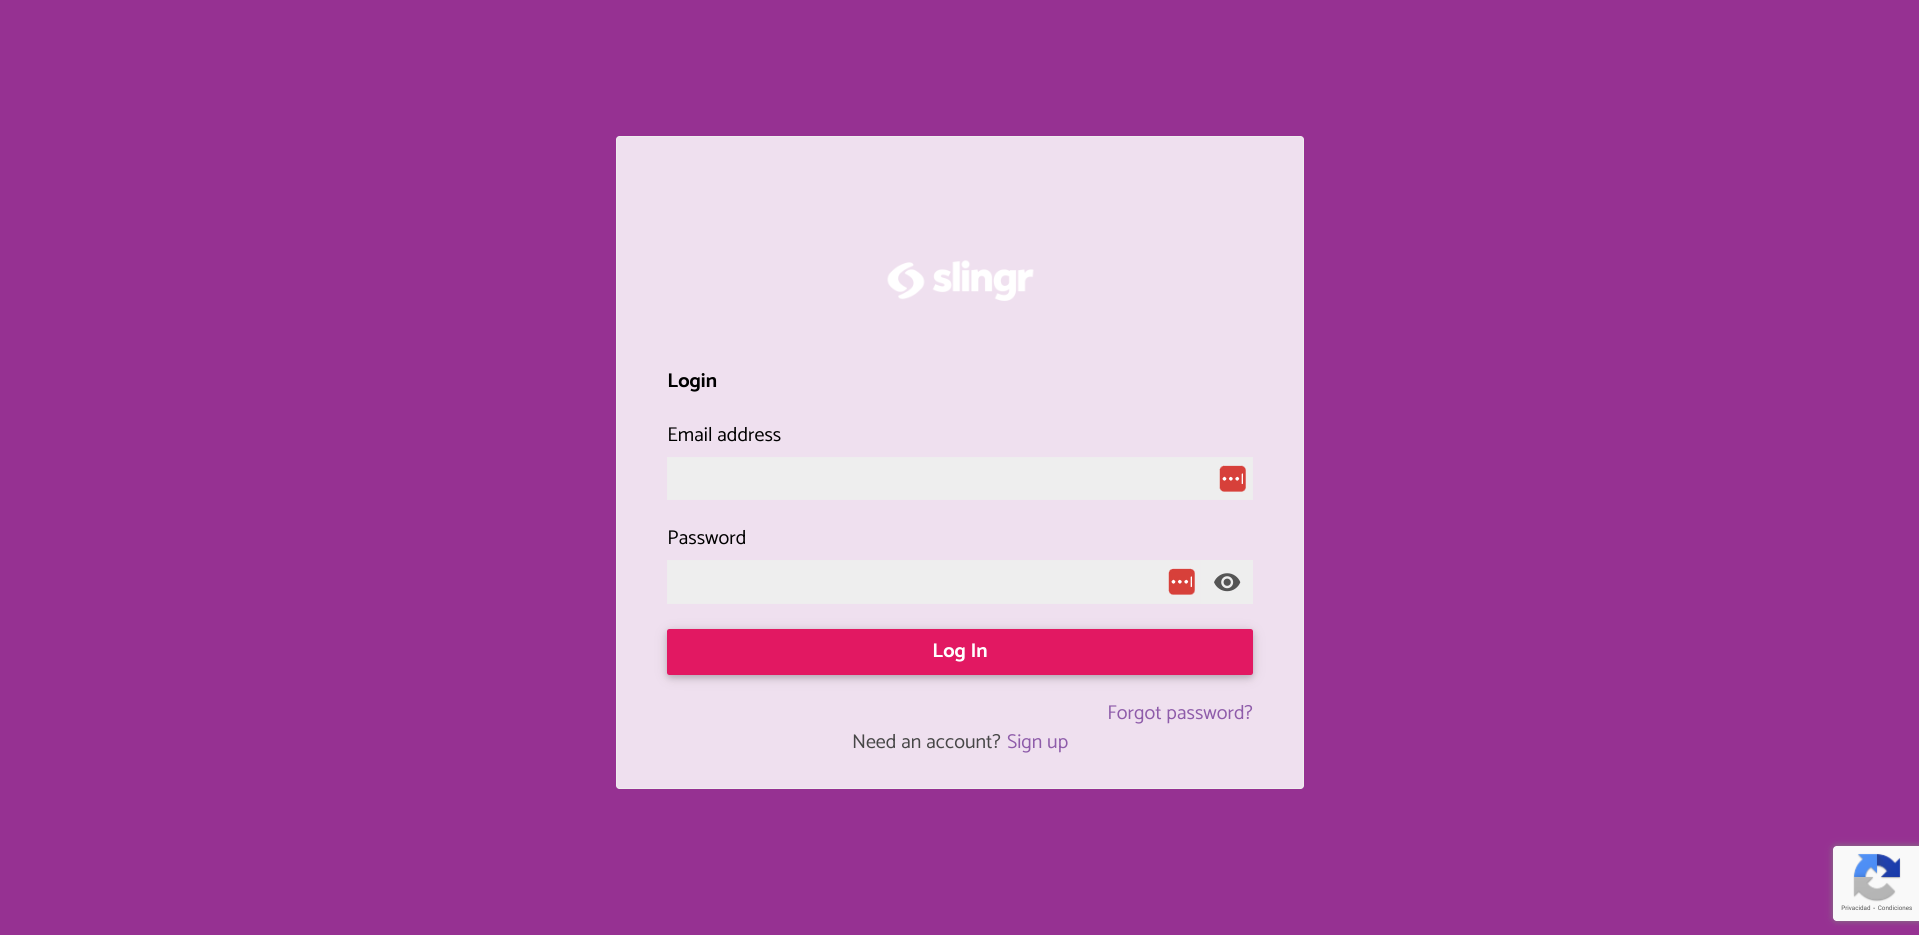
- After configuring app settings in Slingr and applying the changes, a “Sign Up” button will automatically appear on the login page of the app.
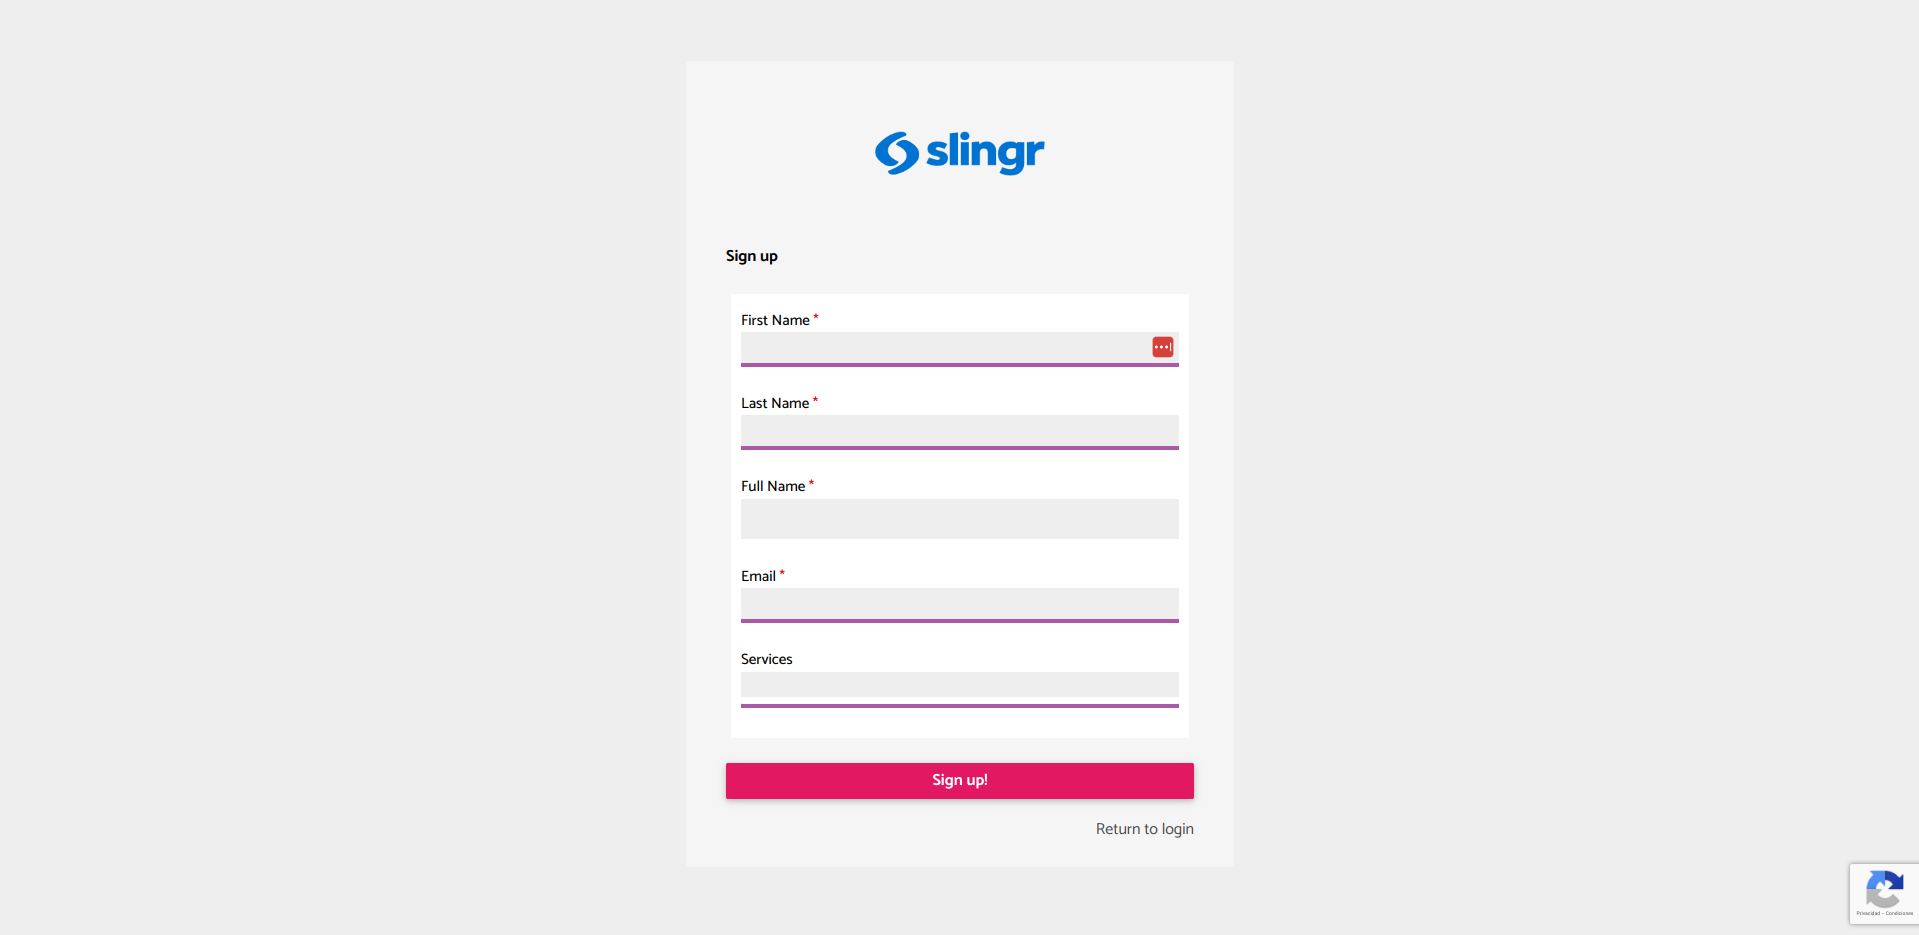
- When you enter the sign-up page of the application, you will see the form with the fields to create a user.
https://<appName>.slingrs.io/<environment>/runtime/signUp.html
The Facebook identity provider enables users with Facebook accounts to log in to your application.
To create an app on facebook, you will have to be registered as a developer on facebook and create an app that has the option to “Allow people to log in with their Facebook account.”
- Go to the Facebook Developers.
- Create an App.
- Go to Use Cases and click on Customize.
- You have to Add the field email so that data is sent to Slingr App.
- In the same page make click on “Go to settings.”
- Enable the option: “Login with the JavaScript SDK.”
- Add your “OAuth redirect URI” on the field “Allowed Domains for the JavaScript SDK” (have this format:
https://<appName>.slingrs.io/<environment>/runtime/api/sso/<providerName>/consumerandhttps://<appName>.slingrs.io/<environment>/runtime/api/sso/<providerName>/consumer/authCallback) - Add your App base url on the field “Allowed Domains for the JavaScript SDK” (have this format:
https://<appName>.slingrs.io/) - Save changes
- Go to App settings -> Basic.
- Copy App ID and App secret.
- Complete all required fields.
App ID
When you create an App, a unique and permanent ID is automatically generated. This value serves as the Client ID that you need to configure in the Slingr app.
OAuth redirect URI
The OAuth redirect URI is the URI you need to configure in your Facebook App. The standard format is:
https://<appName>.slingrs.io/<environment>/runtime/api/sso/<providerName>/consumer.
Default user group
If it is allowed to create users when signing in through this identity provider, any new user created will be automatically assigned to this group.
After configuring app settings in Slingr and applying the changes, a “Sign In” button will automatically appear on the login page of the app.
Redirect to a URL after login
This flag allows generating a redirection after a successful login. It can redirect to a view, an external page or a html from the public files. The user token will be sent as header and as query param to maintain a context.
The Google identity provider enables users with Google accounts to log in to your application.
Service account of Google
To generate a service account in Google, follow these steps:
- Go to the Google Cloud console and log in as a super administrator.
- Create a project in the Google Cloud console.
- Activate the APIs for the service account.
- Create a service account (OAuth 2.0 Client ID) in the Google Cloud console. (On the Credentials menu)
- Assign roles to the service account to provide access to GCP resources.
- Add your app url in the Authorized Javascript Origins field.
https://<appName>.slingrs.io
Client ID
When you create a service account, a unique and permanent ID is automatically generated. A service account name is provided in the email address format: SA_NAME@PROJECT_ID.iam.gserviceaccount.com. This value serves as the Client ID that you need to configure in the Slingr app.
OAuth redirect URI
The OAuth redirect URI is the URI you need to configure in your Google Cloud console, in the same Google service account you created earlier. The standard format is: https://<appName>.slingrs.io/<environment>/runtime/api/sso/<providerName>/consumer.
Default user group
If it is allowed to create users when signing in through this identity provider, any new user created will be automatically assigned to this group.
After configuring app settings in Slingr and applying the changes, a “Sign In” button will automatically appear on the login page of the app.
When a user clicks the button, a popup will open, allowing the user to select their Google account to use for signing in.
Redirect to a URL after login
This flag allows generating a redirection after a successful login. It can redirect to a view, an external page or a html from the public files. The user token will be sent as header and as query param to maintain a context.
Microsoft
The Microsoft identity provider enables users with Microsoft and Azure accounts to log in to your application.
Create Microsoft Entra app
To create a new Microsoft Entra app, follow these steps:
- Sign in into Microsoft Entra portal.
- In the side menu, collapse
Applicationsand click onApp registrations. - Set a name for the app and in the
Supported account typessection, select the following option:- Accounts in any organizational directory and personal Microsoft accounts
- Click on
Register - Once created, in the app overview, go to Authentication.
- Add a platform configuration by clicking on
Add a platform. - Select Single-page application, then configure the OAuth2 redirect URI in the required input and check the following options:
- Access tokens (used for implicit flows)
- ID tokens (used for implicit and hybrid flows)
- Click on Configure.
Application ID
When you register an app, a unique and permanent ID is automatically generated. The ID format is similar to UUID.
OAuth redirect URI
The OAuth redirect URI is the URI you need to configure in your Microsoft app, in the same app you registered earlier. The standard format is: https://<appName>.slingrs.io/<environment>/runtime/api/sso/<providerName>/consumer.
Default user group
If it is allowed to create users when signing in through this identity provider, any new user created will be automatically assigned to this group.
After configuring app settings in Slingr and applying the changes, a “Sign In” button will automatically appear on the login page of the app.
When a user clicks the button, a popup will open, allowing the user to select their Google account to use for signing in.
Redirect to a URL after login
This flag allows generating a redirection after a successful login. It can redirect to a view, an external page or a html from the public files. The user token will be sent as header and as query param to maintain a context.
Slack
The Slack identity provider permits Slack users to log in to your app.
Allow login with any team
This setting defines which Slack users can sign in. Enabling it allows any user to log in. Disabling it requires specifying a list of allowed teams using their IDs (not domains). The team ID can be obtained via the Web API by setting the request token in Extra args as token=XYZ123. For further information, refer to Legacy tokens in the official documentation.
Use default slack application
If you opt not to create a Slack application, the default one provided by Slingr can be used. However, creating a custom Slack application enables branding and personalized app names for users signing in with Slack.
To use a custom Slack application, provide the following settings:
Client ID: ID of the custom Slack application.Client Secret: Secret of the custom Slack application.Redirect URI: URI configured in your custom Slack application.
For details on creating a Slack application, consult the documentation at Getting started with Slack apps and Sign in with Slack. The sign-in button is pre-implemented in Slingr!
Default group
When new users are created via this identity provider, they will be assigned to this group by default.
Veritone
The Veritone identity provider enables Veritone aiWARE platform users to sign in to a Slingr app.
Configure application in veritone aiWARE platform
To register the Slingr app on the Veritone side, configure the following settings:
Application Label: Label for the Slingr app.URL: URL of the Slingr app. Standard format:https://<appName>.slingrs.io.OAuth2 Redirect URL: URL in Slingr where the access code will be received. Format:https://<appName>.slingrs.io/<environment>/runtime/api/sso/<providerName>/consumer.
Optional settings such as Application Description and Icon can also be specified.
Refer to the Veritone aiWARE docs for guidance on creating a Veritone aiWARE application.
Configure identity provider in Slingr app
After registering the app with Veritone, you’ll receive an ID and OAuth2 Client Secret. Using these, create an identity provider record in the Slingr app with the following settings:
API URL: API URL for authentication. Production URL:https://api.veritone.com.Client ID: Client ID of the Veritone application for single sign-on.Client Secret: Client secret of the Veritone application for single sign-on.Default Group: New users created through this identity provider will be assigned to this group by default unless user role information is provided.
Users management
Creating or updating users when signing in through this identity provider is permitted. Synchronized user attributes between Slingr and Veritone include id, first name, last name, email, and roles.
Once Slingr app settings are configured, a sign-in button will automatically appear on the app’s login page.
SAML
SAML is an open-standard data format for exchanging authentication and authorization data between parties (see Security Assertion Markup Language).
SAML is commonly used in corporate environments, allowing users to access your Slingr app without needing to log in again, thanks to centralized user management.
Login URL
Provide the URL for user sign-in, provided by the SAML identity provider.
Change password URL
Provide the URL for changing user passwords, provided by the SAML identity provider.
Certificate
Supply the certificate used to validate the authenticity of tokens. Copy the certificate content as-is.
Synchronize only external groups
Enabling this option synchronizes only the groups added by the identity provider in the past. If a user belongs to groups A, B, and C, but only C was added by the identity provider, adding group D won’t remove A and B.
Attribute mapping
Attribute mapping specifies how attributes from the identity provider map to user attributes. The default mapping assumes the presence of the following attributes:
userId: Immutable ID from the identity provider (used as the user’s external ID).userEmail: User’s email in the identity provider.userFirstName: User’s first name in the identity provider.userLastName: User’s last name in the identity provider.userGroups: Groups to which the user belongs in the identity provider, separated by commas.
For custom mapping, a script context is provided. Parameters include idpAttributes for attributes from the SAML identity provider. The script should return an object containing attributes such as userId, userEmail, userFirstName, userLastName, and userGroups.
If you decide to provide a custom mapping, here is the context of the script:
Parameters
| Name | Type | Description |
|---|---|---|
| idpAttributes | object | This object contains all the attributes coming from the SAML identity provider. For example if the identity providers sends an attribute with name firstName, you should be able to access it using idpAttributes.firstName. |
Returns
object - The script should return an object with the following attributes:
userId: immutable ID from identity provider. This will be set as the external ID of the user for this identity provider.userEmail: email of the user in the identity provider.userFirstName: first name of the user in the identity provider.userLastName: last name of the user in the identity provider.userGroups: groups that user belongs to in the identity provider. It is a list of group names separated by comma.
Samples
// this is a mapping script where some values are encoded in Base64
var Base64 = {
    _keyStr: "ABCDEFGHIJKLMNOPQRSTUVWXYZabcdefghijklmnopqrstuvwxyz0123456789+/=",
    check: function(s) {
        var endsWith = function(s, suffix) {
            return s.indexOf(suffix, this.length - suffix.length) !== -1;
        };
        var base64Matcher = new RegExp("^(?:[A-Za-z0-9+/]{4})*(?:[A-Za-z0-9+/]{2}==|[A-Za-z0-9+/]{3}=|[A-Za-z0-9+/]{4})([=]{1,2})?$");
        return endsWith(s, '=') && base64Matcher.test(s);
    },
    encode: function(input) {
        var output = "";
        var chr1, chr2, chr3, enc1, enc2, enc3, enc4;
        var i = 0;
        input = Base64._utf8_encode(input);
        while (i < input.length) {
            chr1 = input.charCodeAt(i++);
            chr2 = input.charCodeAt(i++);
            chr3 = input.charCodeAt(i++);
            enc1 = chr1 >> 2;
            enc2 = ((chr1 & 3) << 4) | (chr2 >> 4);
            enc3 = ((chr2 & 15) << 2) | (chr3 >> 6);
            enc4 = chr3 & 63;
            if (isNaN(chr2)) {
                enc3 = enc4 = 64;
            } else if (isNaN(chr3)) {
                enc4 = 64;
            }
            output = output + this._keyStr.charAt(enc1) + this._keyStr.charAt(enc2) + this._keyStr.charAt(enc3) + this._keyStr.charAt(enc4);
        }
        return output;
    },
    decode: function(input) {
        var output = "";
        var chr1, chr2, chr3;
        var enc1, enc2, enc3, enc4;
        var i = 0;
        input = input.replace(/[^A-Za-z0-9\+\/\=]/g, "");
        while (i < input.length) {
            enc1 = this._keyStr.indexOf(input.charAt(i++));
            enc2 = this._keyStr.indexOf(input.charAt(i++));
            enc3 = this._keyStr.indexOf(input.charAt(i++));
            enc4 = this._keyStr.indexOf(input.charAt(i++));
            chr1 = (enc1 << 2) | (enc2 >> 4);
            chr2 = ((enc2 & 15) << 4) | (enc3 >> 2);
            chr3 = ((enc3 & 3) << 6) | enc4;
            output = output + String.fromCharCode(chr1);
            if (enc3 != 64) {
                output = output + String.fromCharCode(chr2);
            }
            if (enc4 != 64) {
                output = output + String.fromCharCode(chr3);
            }
        }
        output = Base64._utf8_decode(output);
        return output;
    },
    _utf8_encode: function(string) {
        string = string.replace(/\r\n/g, "\n");
        var utftext = "";
        for (var n = 0; n < string.length; n++) {
            var c = string.charCodeAt(n);
            if (c < 128) {
                utftext += String.fromCharCode(c);
            }
            else if ((c > 127) && (c < 2048)) {
                utftext += String.fromCharCode((c >> 6) | 192);
                utftext += String.fromCharCode((c & 63) | 128);
            }
            else {
                utftext += String.fromCharCode((c >> 12) | 224);
                utftext += String.fromCharCode(((c >> 6) & 63) | 128);
                utftext += String.fromCharCode((c & 63) | 128);
            }
        }
        return utftext;
    },
    _utf8_decode: function(utftext) {
        var string = "";
        var i = 0;
        var c = c1 = c2 = 0;
        while (i < utftext.length) {
            c = utftext.charCodeAt(i);
            if (c < 128) {
                string += String.fromCharCode(c);
                i++;
            }
            else if ((c > 191) && (c < 224)) {
                c2 = utftext.charCodeAt(i + 1);
                string += String.fromCharCode(((c & 31) << 6) | (c2 & 63));
                i += 2;
            }
            else {
                c2 = utftext.charCodeAt(i + 1);
                c3 = utftext.charCodeAt(i + 2);
                string += String.fromCharCode(((c & 15) << 12) | ((c2 & 63) << 6) | (c3 & 63));
                i += 3;
            }
        }
        return string;
    }
};

var attributes = {};
attributes['userId'] = idpAttributes['userId'];
if (Base64.check(idpAttributes['userFirstName'])) {
    attributes['userFirstName'] = Base64.decode(idpAttributes['userFirstName']);
} else {
    attributes['userFirstName'] = idpAttributes['userFirstName'];
}
if (Base64.check(idpAttributes['userLastName'])) {
    attributes['userLastName'] = Base64.decode(idpAttributes['userLastName']);
} else {
    attributes['userLastName'] = idpAttributes['userLastName'];
}
attributes['userEmail'] = idpAttributes['userEmail'];
attributes['userGroups'] = 'Default';
return attributes;
OAuth
OAuth is an open-standard authorization protocol that allows secure third-party access to a user’s resources without sharing their credentials (see OAuth 2.0).
OAuth is widely used in web and mobile applications, enabling users to grant your Slingr app access to their data on other platforms, such as social media or cloud services, without the need to provide their usernames and passwords directly. This enhances security and user experience by leveraging existing accounts for seamless authentication
OAuth redirect URI
The OAuth redirect URI is the URI you need to configure in your service account settings. The standard format is:
https://<appName>.slingrs.io/<environment>/runtime/api/sso/<providerName>/consumer.
Authorization URL
The Authorization URL is the endpoint where users are directed for authentication. It typically follows a structure like https://<provider>.com/oauth/authorize, though the exact URL may vary depending on the provider.
Access token URL
The Access Token URL is the endpoint used to obtain access tokens after the user has completed authentication. This URL generally follows a structure like https://<provider>.com/oauth/token, although the specific URL may vary by provider.
When making a request to the Authorization URL, the following parameters are typically required:
response_type: Specifies the type of response desired (e.g., code, token).client_id: The unique identifier for your application.redirect_uri: The URI to which the user will be redirected after authentication.scope: The permissions that your application is requesting from the user.state: A unique string to maintain state between the request and callback (used for preventing CSRF attacks).
Ensure to consult the provider’s documentation for any additional required parameters specific to their implementation."
Client ID
When you register an app, a unique and permanent ID is automatically generated. The ID format is similar to UUID.
Client Secret
When you register an application, a unique and permanent secret is automatically generated. The secret format is typically a long string of alphanumeric characters.
Scope
The scope parameter defines the permissions requested by the application from the user during OAuth authentication and may vary by provider.
Default user group
Any new user created will be automatically assigned to this group as the Primary group.
Redirect to a URL after login
This flag allows generating a redirection after a successful login. It can redirect to a view, an external page or a html from the public files. The user token will be sent as header and as query param to maintain a context.
Oauth user handler script
In the OAuth User Handler Script, three parameters are received: code, config, and userRecord.
code: This parameter is the code received from the user’s authorization process.config: This is a JSON object that contains all the configuration settings defined for the identity provider, includingclient_id,client_secret,scope,oauthRedirectUri(which corresponds to the OAuth redirect URI), andtoken_url(which corresponds to the Access Token URL).userRecord: This parameter represents the user being authenticated.
As the first step, the script must obtain the access_token by making a call to the API defined by the provider, using the required parameters. This process may vary from provider to provider. Once the access_token is obtained, a call can be made to the provider’s API to retrieve the user’s data. The script should first check if the user already exists by searching for their email. If the user exists, return their record along with the associated firstName and lastName. If the user does not exist, the developer must ensure that the fields firstName, lastName, and email are filled out; otherwise, the user record cannot be saved, as these fields are required. Finally, the script must return the userRecord.
Samples
  // get access token
const accessTokenResponse = svc.http.post({
  url: config.tokenUrl,
  params: {
    grant_type: 'authorization_code',
    client_id: config.clientId,
    redirect_uri: config.oauthRedirectUri,
    code: code
  },
  headers: {
    'Content-Type': 'application/json',
  }
});
if (!accessTokenResponse || !accessTokenResponse.access_token) throw('Error obtaining access_token')
// get user data
const userDataResponse = svc.http.post({
  url: 'https://shopify.com/87175397693/account/customer/api/2024-10/graphql',
  params: {
    query: 'query { customer { id firstName lastName emailAddress {emailAddress} } }'
  },
  headers: {
    'Content-Type': 'application/json',
    Authorization : accessTokenResponse.access_token
  }
});
if (!userDataResponse || !userDataResponse.data || !userDataResponse.data.customer) throw('Error obtaining customer data')
// fill out userRecord
let email;
if (userDataResponse.data.customer.emailAddress) {
  email = userDataResponse.data.customer.emailAddress.emailAddress;
  if (email) {
    const userRegistered = sys.data.findOne('sys.users', {email: email});
    if (userRegistered) {
      return userRegistered;
    }
  }
}
const firstName = userDataResponse.data.customer.firstName || 'Default first name';
const lastName = userDataResponse.data.customer.lastName || 'Default last name';
if (!email) throw('Missing required fields: email') // you might throw an exception for firstName and lastName
userRecord.field('firstName').val(firstName);
userRecord.field('lastName').val(lastName)
userRecord.field('firstName').val(firstName);                              // Required
userRecord.field('lastName').val(lastName);                              // Required
userRecord.field('email').val(email);                                           // Required
userRecord.field('currentlyWorkingOn').val("Google");              // Optional
sys.data.save(userRecord);
return userRecord;